


The fan clutch controls your vehicle’s engine cooling fan and operates based on temperature. It’s mounted on the water pump and causes overheating when broken. Fan clutches are specially featured on rear-wheel-drive cars because they face the radiator while pulling air through the radiator’s cooling fins and are connected to the water pump while the engine is running.
The fan clutch is used to control the engaging and disengaging of the fan depending on the engine’s temperature. It’s designed with a temperature-sensitive spring. When you drive faster, your engine’s temperature rises, eventually causes this spring to expand and also engages the fan clutch. Internally, it’s made up of a set of clutch plates and a coupling filled with silicone-based oil with an internal valve that opens & closes, directing the oil’s flow between two separate cavities – one of which acts as a reservoir, and the other one goes into the clutch itself.
When the valve opens, fluid enters the clutch to make the fan turn faster, and when it’s shut, the oil flows back into the reservoir. It causes the clutch to slip, and it also forces the fan to spin slower. The clutch may freewheel if the engine is cold, so it starts to work when the engine gets hot, as the fan’s aid is required to keep the engine from overheating.
FAN CLUTCH PROBLEMS
Like almost all other automotive parts, they can go bad due to extended usage, temperature increases, or heat & engine vibration. When it goes bad, it can do so by permanently freewheeling, allowing the engine to overheat or lock up, causing a loud roaring sound and decreased engine power output.
Often one of the potential culprits for fan clutch problems is the temperature-sensitive spring described above. Further, when the fan clutch’s oil consistency slowly degrades over the years, it begins to slip more than expected, eventually slowing down to a point where it doesn’t even keep up with the cooling needs of the vehicle’s engine. Other symptoms that point toward fan clutch malfunction are things like oil leaking or loose clutches, which may cause a bit of a wobble. In case any of this happens to your vehicle, you can contact us at Diesel Components, Inc. anytime you want.
DIFFERENT TYPES OF FAN CLUTCHES
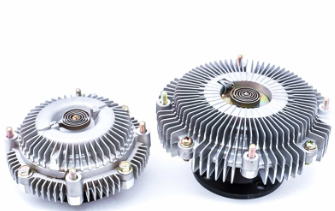
Two different types of fan clutches are most common. The first one is the thermal fan clutch, which works based on temperature and reacts to fluctuations in engine temperature. Apart from that, it also controls the engagement & disengagement of the fan. The other type is non-thermal, and it’s also known as a torque-limiting fan clutch controlled by slippage in the clutch plates rather than temperature control.
LET’S GET STARTED ON THE PROCESS OF REMOVING AN ENGINE FAN CLUTCH
1. Identify the Nut Size
Each fan clutch has a mounting nut size that ranges from approx. 20-35mm, depending on the application. You can also use a large adjustable wrench, but keep in mind that you may need to remove the fan shroud to get to the cooling system.
2. Hold the Water Pump Pulley
You must hold the water pump pulley to remove the fan clutch from the water pump by using a unique tool for this for about $20.00 bucks or by renting one.
3. Remove the Fan Clutch
To remove the fan clutch, install a large crescent wrench onto the clutch’s nut, and hit it using a hammer to loosen the fan. If you are unsure about which way to loosen the fan nut, it’ll always loosen in the same direction as the fan when the engine is running.
After the fan is loose, keep rotating it in the same direction while watching the threads to make sure the fan clutch is turning without the nut. If the nut doesn’t turn, use the wrench to help it along. Try using your opposite hand to support the fan blade to avoid hitting the radiator, as it’ll cause a leak if the fan becomes loose.
4. Replace the Fan Clutch
There will be 4-6 10mm bolts that’ll hold the actual clutch part of the fan to the fan blade itself. To accomplish fan clutch replacement, you can remove the bolts, and the clutch will come free from the blade. Once you have matched up the old fan clutch with the new one, start reassembling it by installing and tightening the large nuts in a cross pattern.
5. Reinstall the Fan Clutch
After installing the new part, slip the fan clutch gently down in front of the water pump. Use caution to avoid contacting the radiator or damaging the plastic fan blade. The threads on the water pump flange are huge and can be cross-threaded easily. Steady the fan by holding the clutch’s center while watching the threads to make sure you are square to the water pump. Once threaded on, insert the large wrench to finish installing the fan clutch onto the threads. Finally, tap the fan to tighten it completely, and you are all set.
What Now?
After replacing, well-established practice is to start your vehicle, listen for abnormal noises and watch for movements in the replacement parts that aren’t consistent.
NEED FAN CLUTCH REPAIR? CONTACT DIESEL COMPONENTS INC. NOW
To perform fan clutch repair perfectly, we at Diesel Components, Inc. have not only the model-specific parts but also knowledge & skill that come from a high level of training along with years of experience. For fan clutch repair, the expert technicians at Diesel Components, Inc. possess over 40 years of training and hands-on experience and are exceptionally skilled in using the most advanced and up-to-date fan clutch repair techniques.
At Diesel Components, Inc., we also stock components to cover almost all the heavy-duty fan clutch repair requirements. We can easily cover 99% of fan clutch part numbers, many of which are very difficult to find or have become obsolete. If your fan clutch is worn beyond repair, we also have a stock of new fan clutches to meet your needs, so if you need fan clutch repair, contact us now.


